|
|
|
By now you should have created several HTML (web page) files and linked them together. But so far, your pages have just contained text. It's time to add some images -- pictures or drawings -- to your web page.
Just as every one of your web pages is an HTML file on your computer, every image will be a file. Photographs, drawings, and artwork can be stored in any of several different file types. The last part of the file name always identifies the file type. Two types are safe to use on your web pages:
All modern web browsers can display these two image file types. But you may encounter some others, and you should know how to recognize them and what to do about them:
If you're lucky, your scanner and drawing software will give you the option to save your images in JPEG or GIF format. If you're not lucky, you may get some other file type. Fortunately, there are many programs that will convert images from one file type to another. I use a program called Lview Pro. You can download a trial version from http://www.download.com (just search for "Lview Pro"). Lview Pro understands several image file formats, including GIF, JPEG, BMP, and TIFF. (My old copy of Lview Pro doesn't know about PNG files; newer versions might.) You can open a file of one type, and save it as another type. You can also perform some simple image editing, like cropping and rotating images. The program is straightforward, so I won't give a detailed explanation of its use.
You can get image files in many ways.
Save the image file in the same folder as your HTML files. As always, give the image file a meaningful name. Raclogo.gif will be easier to remember than Image1.gif.
Usually you'll want to place an image somewhere within one of your web
pages. You can put an image anywhere you could type a character: ar the
start or end of a line, on a line by itself, or even between 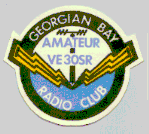 words.
Here's how to do it:
words.
Here's how to do it:
Now you can move around in the file. Scroll down to the place where you want to put an image, move the pointer there with the mouse, and click. You should see the text cursor (vertical bar) flashing at the desired point. Now,
You should see the image added to your web page. To remove it from the page, click on the image -- a black outline box should appear around it -- then press the Delete key. Note: do not use the Browse button to select your image. Netscape 3 has a bug, and while you'll be able to see the image, no one else will. (For the curious: the image is saved as a file: URL with the path name of your hard drive, rather than a "local" file name.)
You can control how the image lines up with the text around it. Click on the image to select it, then click Properties/Image. Under "Alignment" you will see seven buttons, which do the following:
When you use the "wrap" options, the text following the image (i.e., after the point where you inserted the image) will be wrapped around the image. This will include subsequent paragraphs, if needed to fill the space! Also, when you use the "wrap" options, you won't see the image correctly displayed in the editor. The only way to see how the final web page will look is to click File/Browse Document.
Try the various options to see how they work.
Whenever someone views your web page, all the image files you have placed in that page get loaded automatically. This means your web page loads more slowly. The bigger the image, the slower the load...and the slower the load, the more people will just click "Stop" and go somewhere else. So you don't want to put big images on your page.
Instead, you can link to an image file. This is exactly the same as linking to another web page. Type some descriptive text, like "Photo of our team." Click and drag to select that text, then click Insert/Link. In the "Link to a page location or local file" box, type the name of the image file (including the .jpg, .jpeg, or .gif at the end). Then click OK. If you want to use the Browse File button to search for your image file, you'll have to change the "Files of Type" box. Normally this reads "HTML files." Click on the little down-arrow at the right of the box, and then click on "All Files" in the list which appears. This is the only way to see GIF and JPEG files in the browser window.
Now only the descriptive text appears on the web page, underlined and blue to indicate that it's a link. When you click on the link, the image appears on a page of its own.
A "thumbnail" image is a tiny copy of the image, which links to a full-size copy. (The tiny copy is supposedly the size of your thumbnail, hence the name). This lets viewers see a quick-loading "preview" of the image, and then opt to load the full image if they want more detail. This requires three steps:
You need Lview Pro or another image processing program for this. In Lview Pro, click File/Open to open the full-size file. Then click Edit/Resize, and adjust the size ratio sliders to a number less than 1.00. 0.5 will shrink the image to half size; 0.25 to one-quarter size, and so on. You can instead type the desired width x height (in pixels) of the reduced image. Click OK to reduce the image, then click File/Save as to save it with a new name. Don't use File/Save, or you'll lose your original full-size image.
Use Insert/Image from the Netscape Editor to put the new, reduced image into your web page. The procedure is the same as described above; just remember to use the file name of the reduced image file (that you saved from Lview Pro).
In Netscape Editor, click on the image you've just inserted. A black outline box will appear around the image, indicating that it is selected. Then click Insert/Link and proceed to enter the file name of the full-size image file. The procedure is the same as described above, except that you're selecting an image (the thumbnail image) rather than selecting some descriptive text.
Incidentally, you can attach any kind of link to an image. Just type an HTML file name or a URL instead of the "full-size" image file name, when you're doing Insert/Link. As an example, the Georgian Bay Amateur Radio Club image up above has a link to the club's home page, http://greynet.net/~gbarc. If you click on the image, you'll be linked to the GBARC page.
After you edit your web page to include some images, you'll need to upload it again to your web host. (You should be getting good at this by now.) Dial up your Internet Service Provider, then click File/Publish. You have two options:
After you've uploaded the page, check it with a web browser. Better still, have a friend check it, to make sure that all the images are accessible from the web host.
Are you finding these articles useful? If so, send me an email at ve3rhj@rac.ca.